Thanks.

The holidays are a time to reflect on what we’re thankful for… our friends, family, good health, the experiences we’ve learned, and so much more. Sometimes it’s hard to squeeze this time in between holiday shopping, visiting relatives, decorating, and cooking… but I think the lack of this is what makes people so crazy this time of the year. In an effort to maintain some of my own personal sanity, I’d like to say that I’m thankful for the amazing family’s, couples, dancers, and individuals I’ve had the chance to photograph this year. It’s been an amazing year, and I can’t wait till the next one! Go 2012!


Tsevi PinupArastya

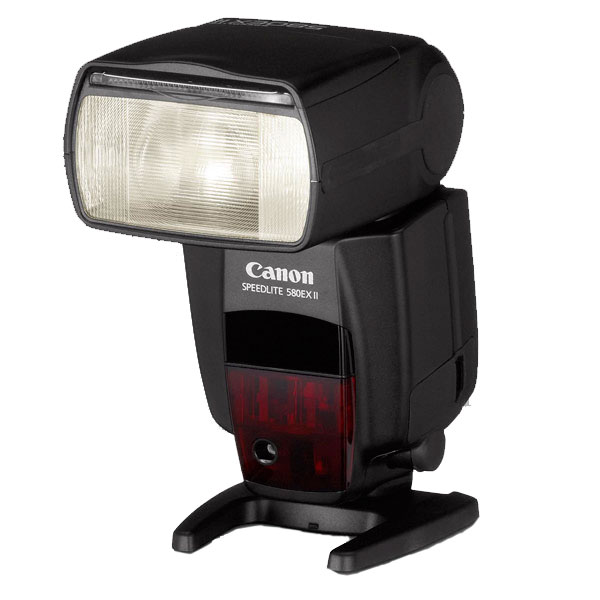
Review: Canon 580ex II

Stock Photo of a Canon 580ex II

Stock Photo of a Canon 580ex II

The Canon 580ex II. First up, if you’re still getting by with your on-board flash on your camera… good for you. However, I may seem like the bearer of bad news here but… you have no idea what you’re missing out on! For a while in the beginning (and unsatisfied with the harshness of the on-board flash) I’d been using a Gary Fong “Puffer” to soften the light when I needed some flash-fill. However, that flash just wasn’t going to get me the “Oomph!” that I needed to really “reach out” with my flash (the on-boards are usually good for like… 6-15 feet and that’s it). I picked this Canon Speedlight up and another diffuser and set to putting it through it’s paces and here’s what I’ve got to say: Let’s keep it simple and tidy… so here goes!
 
 
What’s hot:

  • WAY more reach than an on-board flash.
  • Bounce flash option to get more “natural” looking light.
  • Fill card and “wide angle” cover are very useful and built right into the head! Easy to use, then store.
  • Very adjustable to your specific needs.
  • Can be used as a “Master” unit to control “Slave” units that are placed off camera.
  • Can be controlled by select Canon cameras with built in master unit and act as a slave flash off camera.
  • Sturdy build quality (even the accessory stand is made of metal).
  • Rechargeable Energizer batteries last a lot longer than I was expecting in the unit, while maintaining good recycle rates.

What’s not:

  • I’ve been afraid I’m going to break whatever the mechanism/pin is that locks the head in place (released via a button), but it’s held up so far over the past year I’ve owned it.
  • All those adjustments take you a while to wrap your mind around. You can easily go from beginner to advanced lighting with this unit… a plus, but this means there’s a noticeable learning curve if you want to get it off “Auto” and your pictures to come out looking good.
  • Bulky. (Though a battery grip on my 7D seems to help balance the weight out a little more for me)

All in all I’m pleased with it. It’s given me a new perspective and creative outlet for off-camera, on location flash that I simply can’t have in the studio when I’m anchored in place. I’ll suggest patience and taking time to learn all the ins and outs of the product if you take the plunge. Also… Wedding photography (even as just a “guest”) takes on a whole new level with creative and intelligent use of my Canon 580ex II. I highly recommend this (and off-camera flash in general) product.

Aalim Najim


I recently held what I like to call a “Quickshoot” for the dancers of Aalim Belly Dance Academy in Oklahoma City. The stars of the event included the performance group “Aalim Najim” (who will be performing at a national competition in Las Vegas soon), for a group/performance photo. These “Quickshoots” (as their name implies), are quick 15-minute sessions that keep the pace moving so that the more experienced dancers/models can get in and out, and the newcomers don’t get bogged down by the worries and stress of a longer session. Most of the newer girls come in very nervous but excited, so we spend a little time putting them right into a familiar routine and get them comfortable with my suggestions and direction, but thankfully most of them have already had some level of experience in posing themselves for an “audience”, which makes my job pretty easy. For those times when things aren’t so easy, my assistant is an experienced belly dancer, so she’s very handy when I can’t remember a pose name, or to help make small adjustments to get a pose just right in the “proper dance form” sense. Having someone who’s experienced with your subject matter can be invaluable in an assistant!
 

MahalahTsevi

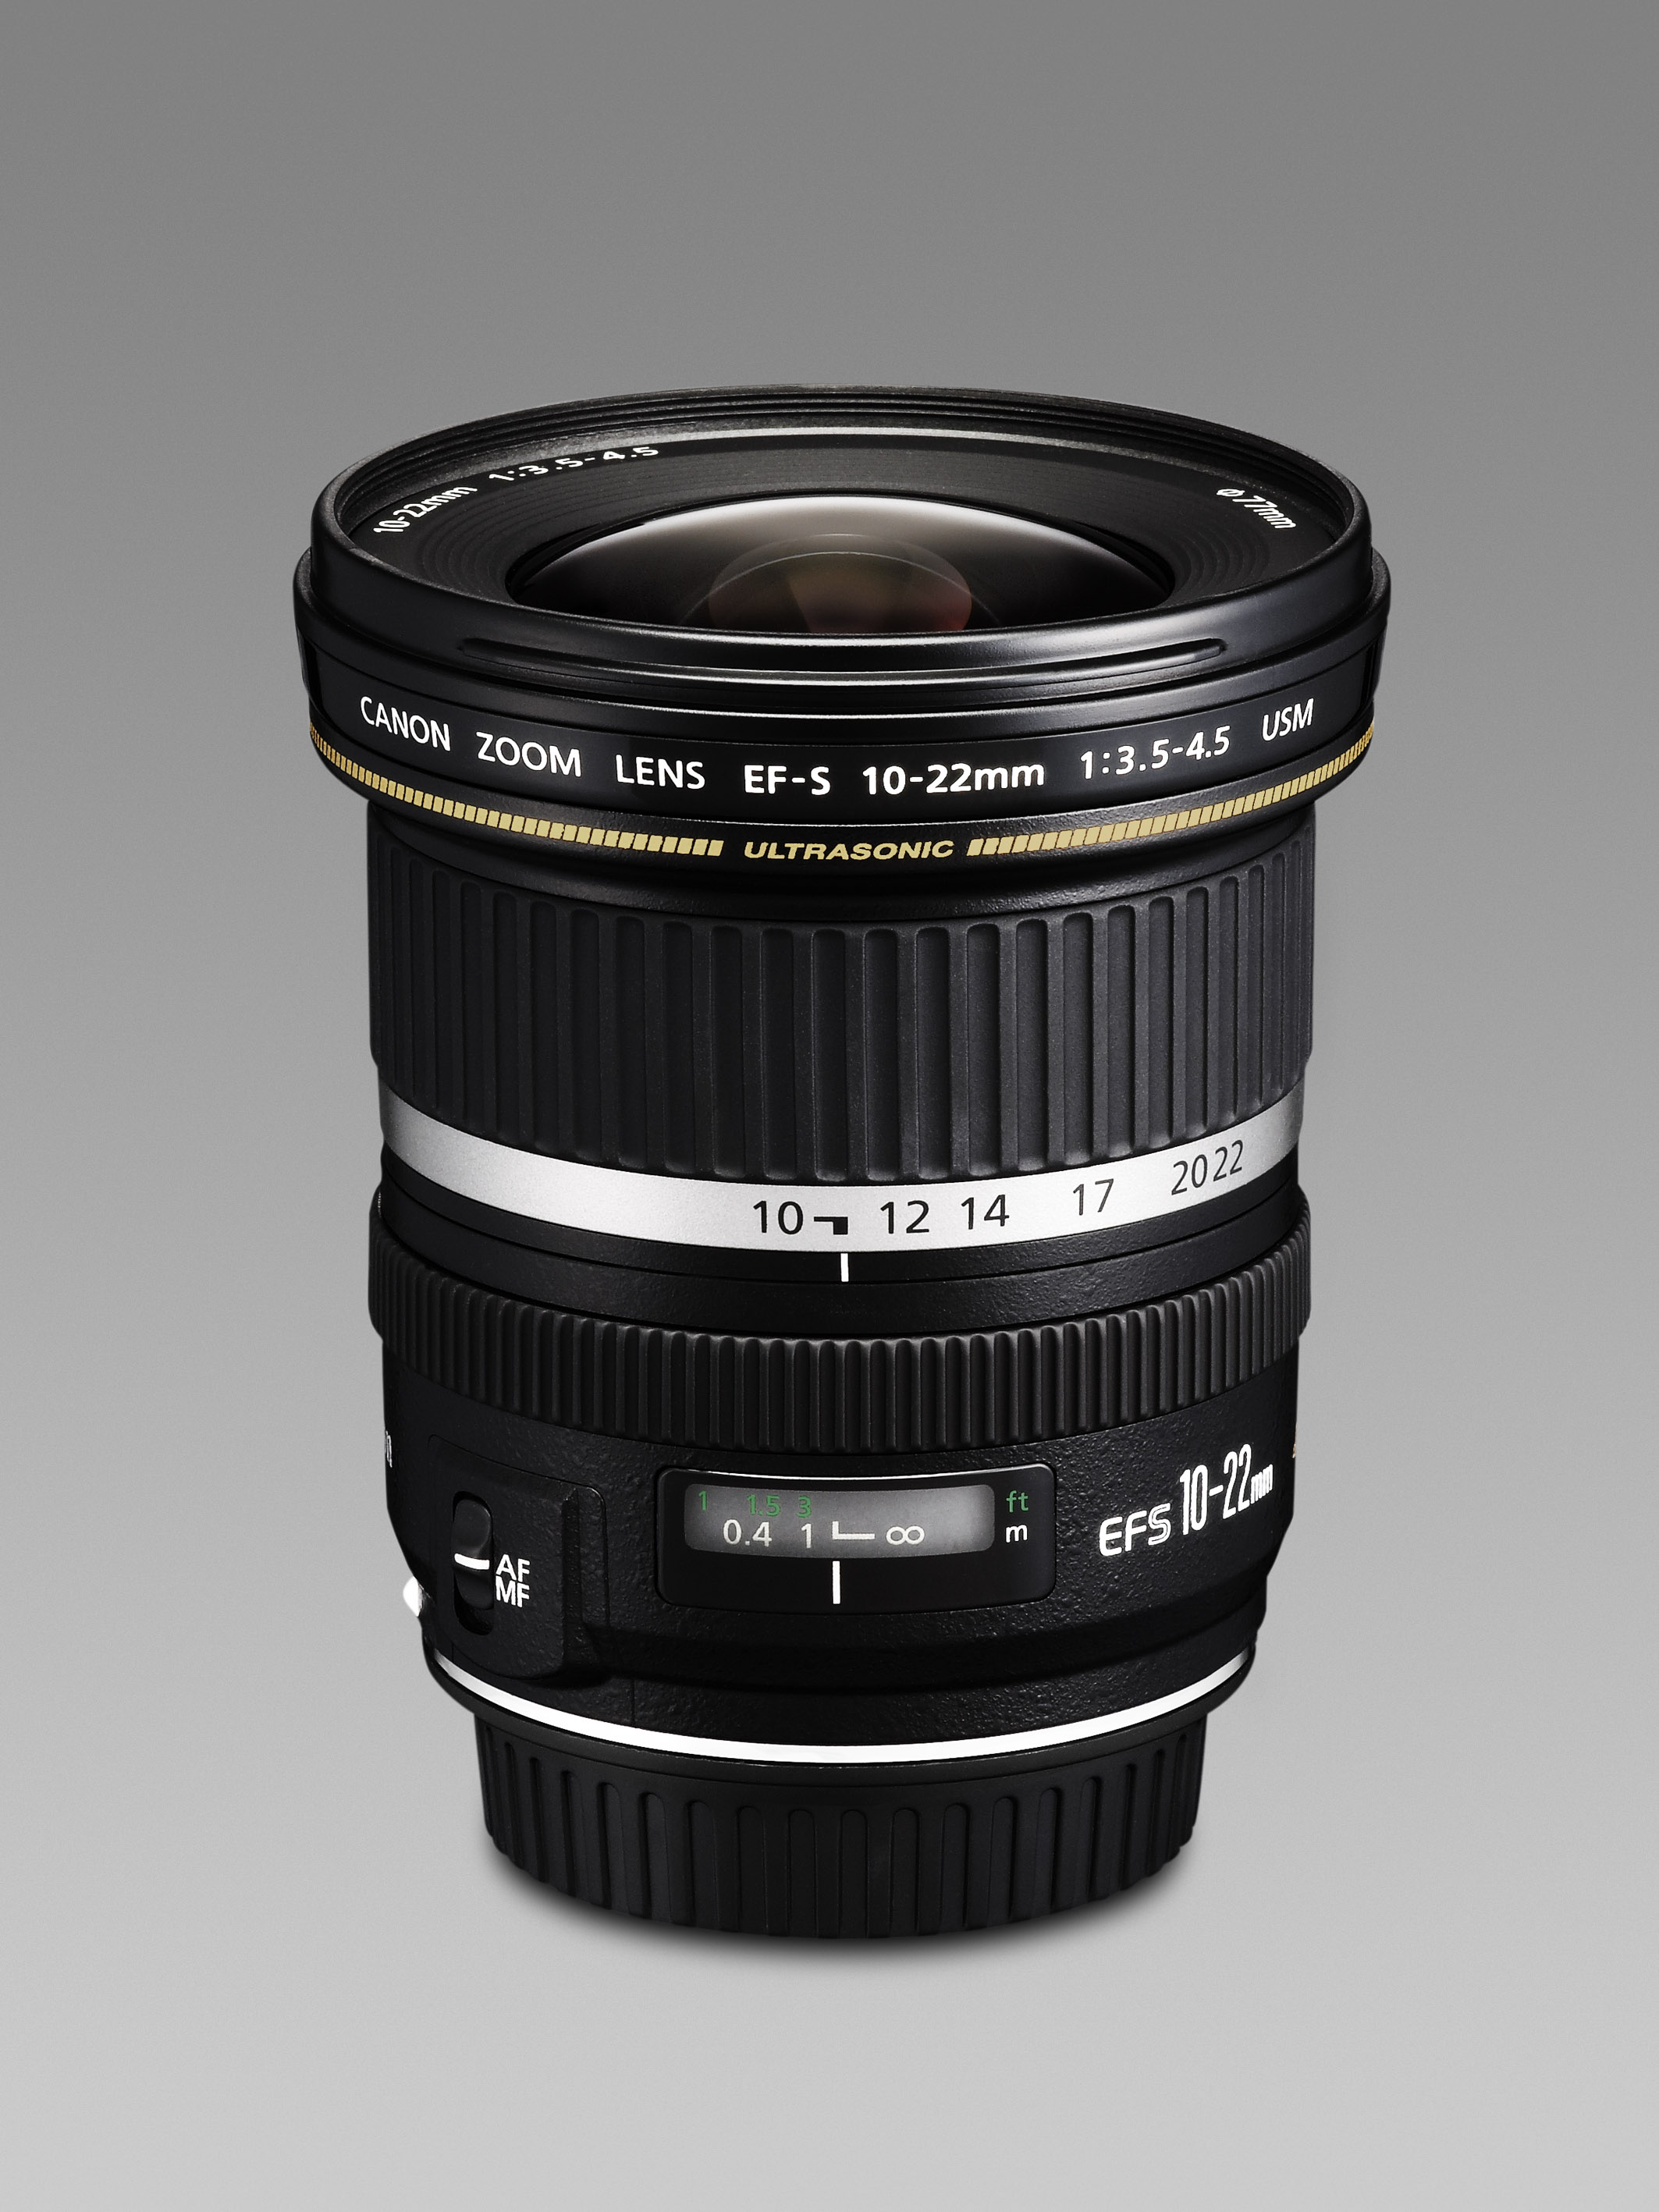
Review: Canon EF-S 10-22mm f/3.5-4.5 USM

Stock Photo of a Canon EF-S 10-22mm

Stock Photo of a Canon EF-S 10-22mm

Any time I start getting the itch to try out a new lens, I’m sure I do much like any other photographer on a budget… I grab my computer or smart phone and use the power of Google. Unless I decide to try and drop some money on renting a lens (which is a great idea… I recommend “BarrowLenses.com“, if you don’t mind using money to “try before you buy”), I hit up the internet for scores and scores of professional (such as “The Digital Picture“) and non-professional (like “Amazon“) reviews. This lens has been tried and tested a TON since it’s introduction… so I’ll stick to a short couple of lists/facts that are all from my PERSONAL experience with my particular lens, and in no way is an attempt to regurgitate over used buzz words or other peoples “facts”.
 
 
What’s hot:

  • Sharp Optics (Surprisingly so. Better, in my experience, than a Canon 28-135mm IS USM and Tamron 70-300mm at their best, but not quite up to the level of my “L” glass).
  • Full-time manual focus override.
  • Super wide angle to ~almost~ “normal” on a ASP-C (cropped) sensor.
  • Smooth operation, good fit and finish. Not a metal barrel, but still feels solid.
  • Good contrast.
  • Handles distortion pretty well when zoomed all the way out for a lens that gets THIS wide.
  • As with most quality lenses, it will hold it’s value, even used
  • Good, minimal focus distance.

What’s not:

  • Chromatic aberration rears it’s ugly head when wide open and kicking it around 10mm’s. I hear it’s better than most the other choices in this range, but it’s still more than I’m a fan of. (This can be, mostly, compensated for by zooming in to about 12mm’s, or stopping down a little more.)
  • Not “weather sealed”. I personally haven’t had any issues, but when I go hunting for an epic landscape shot, I shy away sometimes if the weather is particularly rainy because while my 7D can take it… my lens might not be so lucky.
  • Pricey.
  • Won’t stay with me on “Full Frame” (EF-S mount).
  • Without IS or F/2.8, it’s usable, but not ideal for low-light shots with subject movement or no tripod. (Usable, but not ideal)

Final Word:
If you’re running an ASP-C sized sensor on your Canon Rebel, xxD, or 7D and you’re looking for “real” super wide angle shots, there aren’t many choices to be had. BUT… when you have to pull the trigger, I highly recommend this lens and would purchase it again if I had too. If you do not need quite as wide a shot, as much usable range, or want to shoot in lower light (and looking to save about $100)… I’d go with a Tokina 11-16mm. I hear it’s supposed to be pretty good as well… but I have no personal experience with it. You win some and lose some either way… but my final word is… the Canon 10-22mm is tough to beat.

TinK

Review: Sekonic L-358 Lightmeter

Stock Photo of Sekonic L-358

Stock Photo of a Sekonic L-358

First… what is this thing? Chance are you probably know, otherwise you’d not be reading this review. However, just in case… a light meter does just that. It meters light. Without diving too deep into things that even go beyond my understanding, the basic use of this device is to “sample” the light in the scene (outside, inside, strobes, hot lights, etc) and give you a reading to help you determine “optimal” exposure for a given set of values (such as film or digital ISO, shutter speed, and/or F-stop you wish to use).

Anyway… I hear many people say they are happy with the built in camera exposure metering, or that they use their digital display screens on the camera to review a picture and make adjustments… using those “reasons” to justify why they don’t go spending hundreds of dollars on a standalone light meter. However, the camera’s built in metering won’t meter flash, and the review screens are tiny and not always as trusty as you would think they should be! To be frank, the price of a standalone meter is a little painful. I purchased this meter from B&H, which has a pretty great reputation for having competitive prices for photography equipment, and this particular light meter runs about $280 or so. My recommendation and solution? Get a light meter. Better yet… get this light meter. Here’s a couple of lists to give you a rundown on why I think so…

What’s hot:

  • Learning curve seems daunting when you pick it up, but is surprisingly easy to grasp within minutes.
  • Weather sealed. (Us it when the weather is less than ideal… it’s okay!)
  • Excellent price for the what you get.
  • Flash metering, EV readings (Exposure value), and ambient light readings. (useful inside, outside, flash, % flash fill, and more)
  • Comes with a lumisphere AND lumigrid.
  • Comes with a carrying case and cord that can be used while in the case, or not.
  • Back-lit LCD is easy to read in the dark and turns on when it automatically detects the light level being low.
  • Has optional accessories to add later, including Spot attachments, a “mini” lumisphere (12mm), and a wireless transmitter for pocket-wizard integration.
  • Can be used to meter flash either by waiting to “see” the flash trigger, or by triggering the flashes with a (not included) sync cable. (Or, like I mentioned above, if you have the optional pocket wizard remote you can use it all wireless)

What’s not:

  • Battery is not “standard” (IE: AA, AAA, etc). You’ll have to hunt one down if it runs out. (I’ve heard they’re easy to find, however, but I’ve not had to look for one yet personally)
  • Pocket wizard accessory isn’t standard.
  • Great value, but $300ish bucks is still spendy.
  • Feels kind of “plastic-y”
  • No “real” pocket for the lumigrid when not in use (though while being stored, I can put it in the carrying case without too much worry).

Overall… I was daunted by the task of learning to use the meter when I first opened the manual but it was literally only about 5-10 minutes later that, thanks to the ingenious way everything is laid out and you can see how your changes effect everything else in real time, I felt very comfortable taking readings and understanding what the meter was telling me. My wife gave me some funny looks as I took readings by her, then in the kitchen, then by a window, then outside, then back inside by a ceiling light… I couldn’t help it! I was intrigued and facinated!

If you’re struggling with proper exposure using studio lights… wanting to check exposure for manual shots in any conditions (especially low light)… this unit is just too darn handy!
Welcome!

Welcome to my blog! For those of you who might be interested, expect this thing to be filled with reviews (photography, technology, and more), projects I’m working on as a photographer, general blogging revolving around my thoughts and experiences, and of course… even more than that.

Return top